18.4 C
Munich
Home Blog Page 12906

How to clean a motorcycle carburetor without removing it

1

Introduction

Removing the carburetor from the motorcycle can be a pain; dismantling it and figuring out what’s causing the problem. Even though the mechanism is essential, it has little pieces that can be lost if disassembled.

Motorcycle carburetor cleaning is an essential aspect of motorcycle maintenance. After a particular amount of miles or at the start of the riding season is the best time to perform this procedure. Keeping your motorcycle’s carburetor clean will help it last longer. According to experts, many engine performance issues are due to the carburetor.

Carburetor Cleaning
Carburetor Cleaning

Carburetors are designed for each motorbike model by each manufacturer. Cleaning is a bit more involved, but it’s also relatively straightforward. We’ll go through various methods for cleaning your motorcycle carburetor without disassembling it.

Carburetor problems are almost as frequent as electrical problems. In older bikes that are difficult to start, don’t tick over, or stutter when you give them gas. But the good news is that carburetors are simple to clean. This activity should be at the top of your “to-do” list if your bike is acting up.

Step by step guide on how to clean motorcycle carburettor without removing it?

  1. It’s hardly surprising that people are looking for ways to clean their motorcycle’s carburetors without removing them from the bike. Carburetor problems and dirty carburetors are the most common culprits when it comes to motorcycle performance. Every time anything like this happens, cleaning can become a laborious chore.
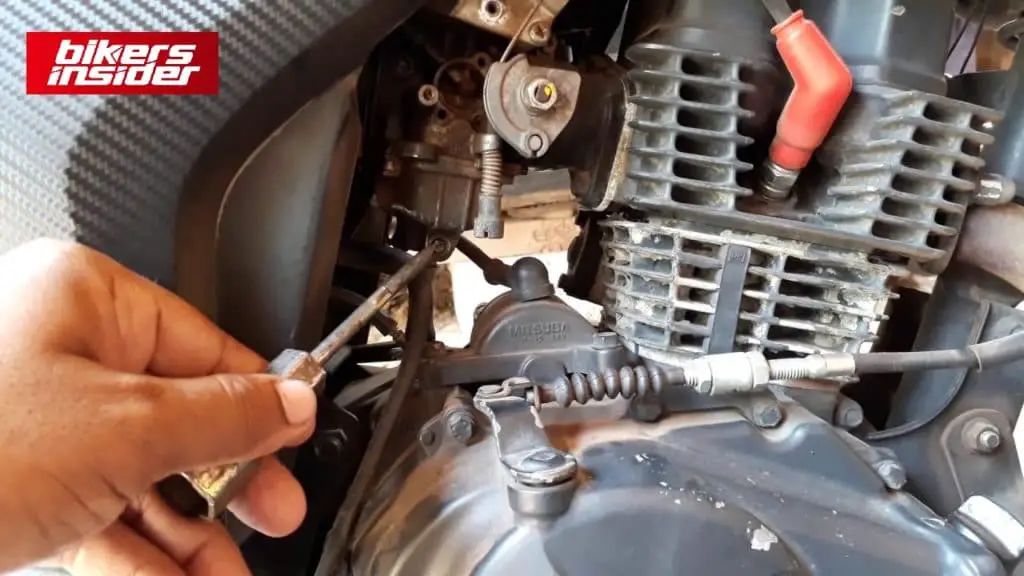
  2. This is where the majority of motorbike carburetors are positioned. Taking the throttle cable and intake boots off is something that many folks would rather avoid. You’ll need to first remove the airbox or pod filters to clean it without dismounting the bike. This is a simple process that may be completed and then reinstalled.
  3. After dismantling the air intake filters, the back of the carburetor will be exposed, allowing you to observe the butterfly valves open and close when you turn the throttle. To gain access to the carburetor, remove these parts. Take the bowl out of the carburetor’s bottom now.
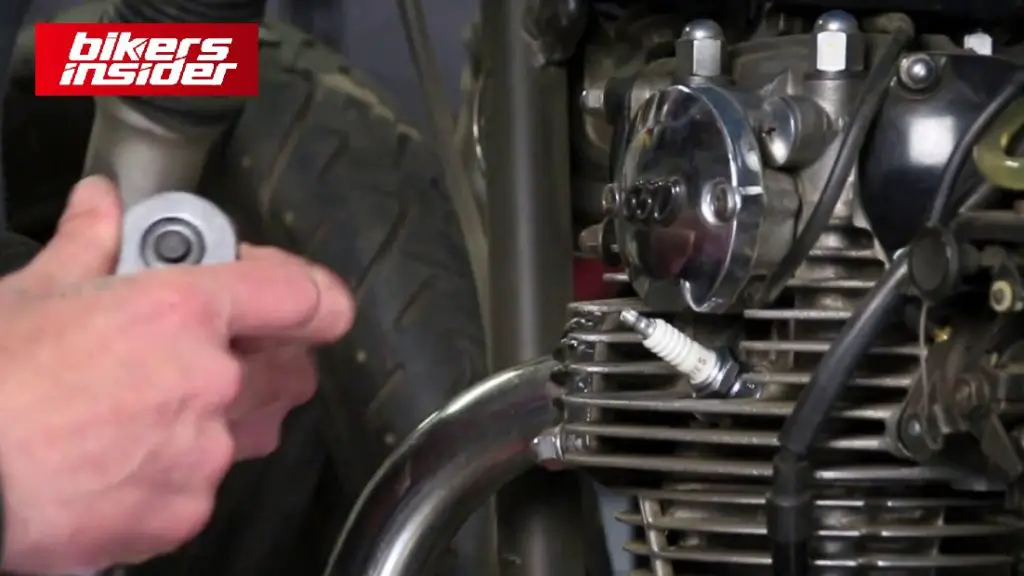
  4. Remove the middle bolt or a few screws around the bowl’s rim to free the bowl from mounting. Taking them off is a breeze and shouldn’t take more than a few minutes. Make careful to turn off your petcock so that you don’t run out of gas. Once you remove the bottom bowls, you’ll probably have some gas leakage, so keep some paper towels on hand.
  5. Spray some carb cleaner into the bowl when it’s unplugged to see if it works. Let any loose debris and filth loosen with a few sprays every few minutes. Start your motorcycle and observe if reattaching the bowl improved its performance. If it didn’t help much, you’d need to remove the bowls once more and follow these instructions.
  6. You’ll notice some floats in the carburetor once the bowl is removed (similar to the floats you see in the tank of a toilet tank). These floats raise when the gas level is high enough to keep the fuel bowl from overflowing.
  7. If you want to see what’s behind the float, you’ll also have to dismantle it. To remove the float, just push through a bit of wrist pin that holds it in place. When you remove the float, you’ll notice a rubber-tipped rocket ship-shaped portion attached to it. An overflowing toilet can be prevented by using this advice to stop it from overflowing.
  8. Together, this rocket-shaped portion and the float will disintegrate. This is an ideal opportunity to check on the flotation devices as they are already open. You can test their buoyancy in a bowl of water. They must be replaced if they don’t float, as this could lead to future mechanical problems with your motorcycle.
  9. Once the float is removed, you may access the carburetor’s jets by looking up within the unit. A primary jet and a secondary jet are generally present. Make sure you can see through the jets once they’re out. This is especially true if ethanol gas is being used. The most common cause of a carburetor not working correctly is clogged jets. Check out my article to find out more about what kind of gas to use on your motorcycle.
  10. Even if you can’t see through the jets, you should still clean them. If you’re not sure what’s lurking inside your body, this will ensure that you’re flushing it out thoroughly. To ensure that all of the gunk is removed, run carb cleaner many times for several minutes.
  11. The carburetor can now be sprayed with carb cleaning. Be sure to reapply the spray indoors and even outside. Allow the cleaner to work its magic for a few minutes before reinstalling all of the pieces. Reinstall the jets, the float, and last, the bowl on the bottom of the aquarium.
  12. Now that you’ve cleaned your motorcycle thoroughly, you can see if it operates properly by trying to start it. If you ever need to get to the carburetor again, you can leave the air intake filters off for the time being. Ignition filter installation may begin once the carburetor is clean.

Cleaning of carburetor with different products

Cleaning of carburetor with seafoam

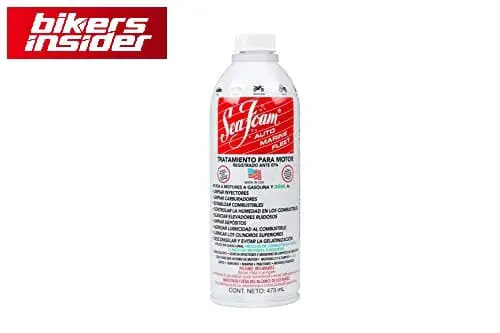
You can easily clean your motorcycle carburetor using Sea Foam. Changing the carburetor does not need to dismantle your motorcycle’s carburetor. For the most part, there are two ways to clean your carburetor; first, by combining Sea Foam with your fuel, and second, by mixing Sea Foam with your engine oil.

Seafoam Spray
Seafoam Spray


To clean your carburetor using fuel and Sea Foam mixture, you need to follow the below steps:

  • Refill your gasoline tank entirely with the sort of fuel you regularly use. You must now add 1 ounce of Sea Foam for every gallon of fuel.
  • Alternatively, you can combine the fuel and Sea Foam combination in a separate tank before pouring it into the tank.
  • Close the tank lid and jiggle your motorcycle for a few seconds after adding the Sea Foam. The Sea Foam can now be fully included in your fuel.
  • Test ride your bike for at least an hour. Sea Foam is cleaning the carburetor, so you’re seeing a lot of white smoke at first.
  • Allow this cycle to complete and examine if the engine is optimized. You may repeat this process if required.

Cleaning of carburetor with carburetor spray

Many factors contribute to the buildup of deposits in the fuel system. The gas station’s gasoline quality can make a big difference in whether or not high octane fuel is free of contaminants. Kerosene or any other universal cleanser cannot remove these particles that clog the carburetor’s valves and jets. Keep in mind that any cleaning containing oil or silicone has an increased risk of choking and is therefore not recommended for use in carburetors.

Best Carburetor cleaners in market
Best Carburetor cleaners on the market

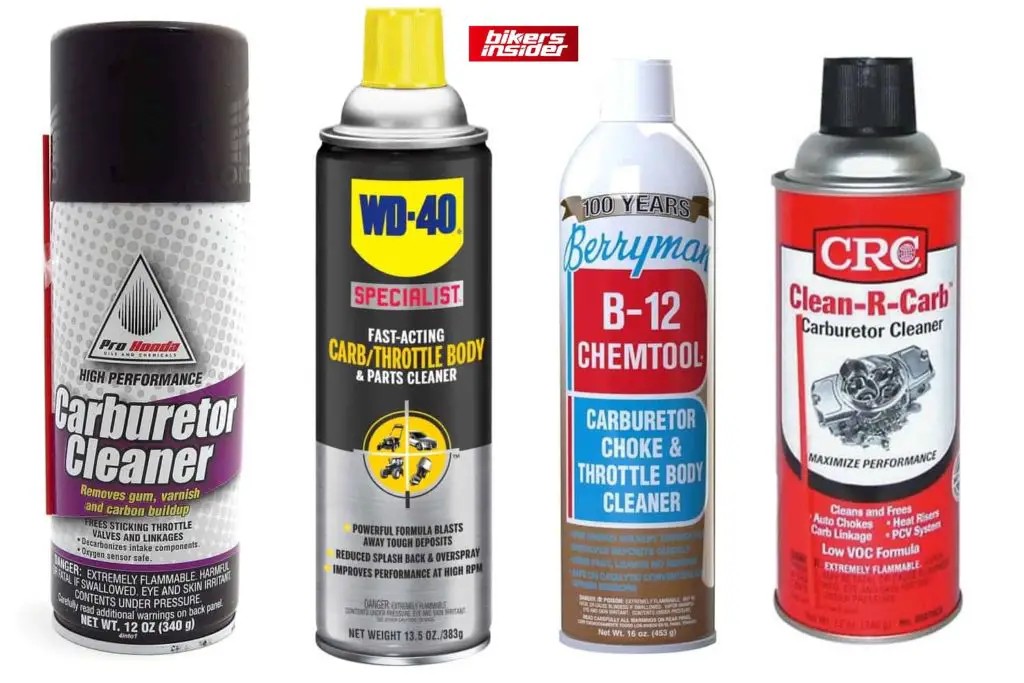
Carb spray is the most convenient method of cleaning the carburetor. Dirt and carbon deposits are washed away during spraying because of the pressure in the cylinder.

To use carb spray to clean your carburetor, follow the instructions below.

  • Turn off the bike’s engine.
  • Remove the air filter and use a product like Gumout® carb cleaning to clean the vehicle’s carburetor, throttle, and float chamber (avoid spraying on electrical connections). Within a few minutes, you’ll see the dirt dissolving.
  • Repeat the cleaning process as necessary.
  • Start the engine and let it warm up for 5-7 minutes on idling before driving.

The carburetor cavity, flaps, and other elements of the fuel system should all have Gumout® sprayed into them while the engine is still running.
Spray the cleaner for 5 to 10 seconds after the engine is turned off.

Wait for the cleaner to dry completely before rinsing or wiping it down.
Your carburetor is now like new. Take your bike out for a spin now after the replacement of the air filter.

Other products to clean motorcycle carburetor

These include the throttle valve, filter, venturi, and the float chamber of the carburetors. Alternatively, you can leave the carburetor installed in the engine and blow compressed air into the holes. Removing the carburetor and cleaning it with a WD-40 Specialist Engine Degreaser is an easy task if you’ve ever done it before on a motorcycle.

HEST, a novel technique, cleans the entire engine’s fuel supply system. This includes the gas tank and the combustion chamber.

Rough idling, poor fuel economy, and engine failure can all be caused by fuel impurities. Reading the label is the best way to determine if a product incorporates HEST technology.

A good carburetor cleaner for motorcycles may also remove deposits like gums, dirt, and other potentially harmful substances from the carburetor. Exhaust fumes are produced due to the chemical reaction between Berryman B-12 and residues.

It’s essential that the cleaner can be completely dissolved in water. The carburetor can’t hold it for long. Carburetor clogging can occur when using cleaning agents such as carbon. As a result, only buy products that have the approval of experts.

How often to clean motorcycle carburetor

Clogged carburetors are not necessarily the cause of engine misfires. So before you spend your hard-earned money cleaning it, you need to know the root source of the problem.

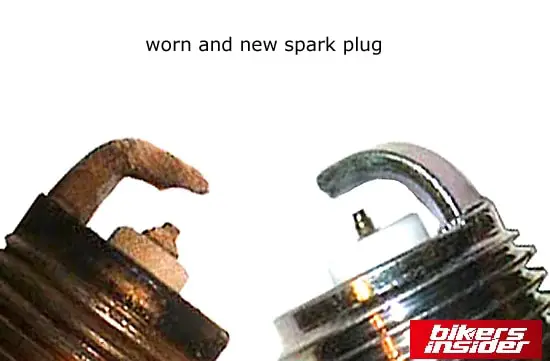
Misfires can be caused by dirty oil or air filters or faulty spark plugs during cold starts, depending on the type of vehicle and how often the engine is started.

Regular use of the motorcycle keeps the carburetor clean because of the consistent fuel flow. As a result, if you ride your bike every day, you should get your carburetor to inspect and clean every six months. You should dismantle and thoroughly clean the carburetor if you are resuming the use of your motorcycle after a long hiatus (post-winter season).

Conclusion

In some instances, a short clean like this isn’t enough to do the job. The carburetor may have other faults that you need to investigate. This necessitates the removal of the carburetor from the bike.

Carburetor disassembly scares a lot of folks. They have a lot of small pieces that are easy to lose. Thanks to the BikerInsider tutorial and many online forums, you can learn how to take apart and put back together with your unique carburetor.

How did your carburetor cleaning go? please let us know in the comment section. For more updates and guides keep visiting BikersInsider.

“Chimera” The Mad Scientist’s Ducati from Balamutti


Aesthetics have a major role in determining most social norms. Only a select few take their engineering to a different level. One of those is this bizarre St. Petersburg-built Ducati.

Vitaliy Selyukov of Balamutti’s workshop created it, and he’s a master at pushing the boundaries of technology. With his latest project, he has managed to keep his cool and build a tricycle Ice Racer Hypermotard.

Balamutti is run by Vitaliy, his wife Sanita, and their daughter Angelina, who all work together. Even so, this “Chimera” The Mad Scientist’s Ducati 900SS-strong construction is anything but simple.

A significant amount of effort reflects in this bike’s front end, which uses a swingarm with central steering and takes up most of that time. The Mad Scientist’s Ducati is an easy comparison point because of its identical front end. Is there anything special about this one?

Concept and Parts

That’s how I got around Bimota’s patent,” explained Vitaliy. “Count Shilovsky, the inventor of this suspension, designed it.” History buffs may recognize Shilovsky as the inventor of the gyroscope-stabilized “Gyro” in 1914.) Vitaliy confesses that Bimota Tesi was a major influence on him. Yet, I’ve made several changes when it comes to the handlebar.

Vitaliy chose high-quality structural alloy steel whenever possible. It was to reduce the drag-free weight without sacrificing strength.

The rest of the bike is significantly modified using parts from other Ducatis, such as the Hypermotard, Monster S2R and the 916 and 1098.

Reworked and painted, the engine was a Desmo L-twin 900SS with a sliding clutch. Sanita welded a unique stainless steel exhaust system. She coated it with a titanium nitride coating, a durable ceramic substance to allow the gas to flow out of the vehicle.

The 7.5-inch-wide rear wheel has 48 spokes and is a unique rear swingarm. The LED brake lights feature several pieces of plastic arranged around a piece of metal inside.

After market addition

Aftermarket parts from Arashi include the floating rotor and twin Brembo brake calipers. They provide optimal stopping force on the Hypermotard’s suspension and linkage. On the back of each wheel is a mirror image of a mechanism same as on the front wheels.

On this equipment, the storage tank is among the few common features. When asked about the original SS900 tank, Vitaliy replied, “I really like it.” As a result, we decided to preserve the form but reduce the size. Aluminum welding by Leonid from Driveinworkshop, a local fabricator. While Vitaliy was at it, he also removed the original dashboard of the Ducati. He installed a little Koso clock on it.

“I 3D printed one where the start button was because it didn’t have an oil pressure light.” He also made a mirror that used polished stainless steel, rather than glass, as the reflective material.

Octopus Art Aerografia’s Anton handled the vibrant paint colors. The aluminum finish on the front swingarm is the most difficult part of the project.

Despite Vitaliy’s admission that he’s a “crazy scientist,” we’re fine with it. They may not be for everyone, but these bikes show that engineering can be fun and offer a lot of color to the realm of customization.

For more news and updates keep visiting BikersInsider.

MK1S Smart Helmet revealed by Forcite

Aftermarket manufacturers have been working on smart helmet add-ons now. In contrast, the smart helmet is now on the verge of becoming a reality. In the past, we’ve talked a lot about Forcite helmets. Smart, linked helmets are a new frontier for an Australian start-up. The MK1S, the company’s new flagship model, has arrived.

The MK1S is the most advanced smart helmet on the market today. Forcite has spent years developing this smart helmet. They have included some of the most cutting-edge technology available. It suffices to remark that no other helmet can match the MK1S intelligence.

Forcite-MK1S-Build
Forcite MK1S Build

Also, it promises excellent comfort and aerodynamics—essential features for any top-shelf helmet. The Harman Kardon high-definition speakers and a slew of other handy features cut the need for an intercom system and an action camera.

Smart capabilities

Due to public equity crowdfunding, the new MK1S is now available for presale on Forcite’s official website linked below. Crowdfunding allowed Forcite to bring the MK1S to life. MK1S helmet includes Forcite’s patented RAYDAR system. It combines LED technology, audio interactivity, a military-grade camera setup, and a handlebar-mounted controller. There’s no need to remove your hands off the bars to access the helmet’s various capabilities.

Forcite MK1S Lining
Forcite MK1S Lining

Besides, it has a battery life of up to seven hours when using all the smart functions. According to Forcite, the camera’s battery life is reduced to three or four hours when it is in use. The helmet has a USB-C plug for charging, and it takes about 90 minutes to recharge. You can make and receive phone calls and use Siri or Google Assistant on your mobile device because it has Bluetooth built-in. By 2023, Forcite hopes to have Bluetooth 5.0 support.

Pricing and availability

Customization possibilities are available for the Forcite MK1S helmet. The helmet production is in Sydney, Australia. With its $1,299 (USD 970) price tag, this helmet isn’t cheap, but it does offer a lot of value, given how much technology it features. In June of 2022, orders will begin shipping.

Its predecessor MK1 made its place in the list of “Top 7 smart motorcycle helmets you can buy in 2021-22“, we hope no less from the successor also.

Take a look at the new Yamaha YZF-R15M World GP 60th Anniversary Edition.

Regular readers are aware of my enthusiasm for sportbikes with tiny displacements. I’m from a place where motorcycles like this make perfect sense. As a first step, they’re a lot more sporty than their more powerful brothers, but without the hefty price tag. They’re also a breeze to ride and turn your regular commute into a thrilling joyride.

It’s also worth noting that the Yamaha YZF-R15 has long dominated the entry-level sportbike sector. So much better than its previous iterations, the Yamaha YZF-R15M is available in special M trim, like the YZF-R1M, Yamaha’s larger sibling.

Performance of Yamaha YZF-R15M

The YZF-R15M World GP 60th Anniversary Edition is powered by a 155cc, 4-stroke, liquid-cooled, SOHC, 4-valve engine producing 18.4 PS at 10,000rpm and 14.2 Nm at 7,500rpm. The fuel-injected engine has Variable Valve Actuation (VVA) coupled to a 6-speed transmission.

The R15M is head and shoulders above the competition in the sub-200cc sportbike sector. It has capabilities reserved for 650cc machines. Among other things, the bike has two riding modes: Track and Street. ABS features on both anchors. What’s cool is that this bike also includes traction control and a quick-shifter to make shifting easier.

There’s an approachable engine hidden beneath all that. To provide the R15M with the 19 horsepower it needs, Yamaha used their tried and true 155cc liquid-cooled, fuel-injected single-cylinder engine. The Yamaha YZF-R15M World GP 60th Anniversary Edition has been released by Yamaha to make things even better. Fans of Yamaha sportbikes will know this livery as the company’s famous Speed Block design. The Valencia GP race bike is the inspiration for the theme on the special edition R15M.

Pricing and availability

Recently, Yamaha has made the special World GP 60th Anniversary Edition R15M available in Thailand, the Philippines, and Indonesia. Yamaha’s outdated street bike model range in India is getting a much-needed refresh with the arrival of this bike. The YZF-R15M in blue and silver costs $26 more than the normal model, so it’s a no-brainer at USD 2,477. A special edition sportbike is sure to be a hit with both casual sporty commuters and those who like to take their bikes out on the track from time to time.

Keep visiting BikersInsider for more news and updates.

How to service your motorcycle: Oil, filters and spark plugs

0

Introduction

Regular maintenance is a must for motorcycles. Keeping the chain (if it has one) greased and inspecting the tyre pressures are the most common daily tasks. This involves maintaining the bike clean to inspect it for signs of wear and tear, such as failed bearings, broken seals, and other indicators of wear and strain. To service your motorcycle, you must first read and comprehend your bike’s owner’s handbook as well as this guide of BikersInsider.

Regardless matter how frequently you ride, the oil filter in your motorbike should be replaced at least once a year.

Servicing of a bike
Servicing of a bike

If your bike has an oil warning light on or is running rough, you’ve waited far too long; you should service your bike at regular intervals for both safety and performance.

Remember that oil, filters, and plugs are only a small portion of necessary maintenance; you should also inspect the brakes, tyres, bearings, cables, electrics, etc.

Tools required to change oil, filter and spark plugs

The intention of this article is not to be all-inclusive of all you need to know about servicing a motorbike. So we strongly advise consulting a manual first.

Our goal is to give you the confidence to do the task yourself, but you will only have the right process if you have a workshop guide relevant to your machine. You will also require the following.

  1. Socket set
  2. Oil filter wrench – you can use a chain-type, but it’s worth investing in a cup wrench, which fits over the filter and makes it easier to remove and torque up correctly
  3. Spark plug socket – there should be one in your bike tool kit, but if not, it’s a huge help to get one that has a rubber insert to grip the plug
  4. Torque wrench. This isn’t essential though.
  5. Screwdrivers
  6. Allen keys
  7. Protective gloves
  8. Oxford clean grips are great for keeping your bar grips from getting oiley.
Oil filter tool
Oil filter tool

Here you can have a look at all the above-mentioned tools you require to service your motorcycle.

Image  Tool Name Picked for
DeWalt Socket Set Check Price
Oil Filter Wrench Check Price
Spark Plug Socket Check Price
Torque Wrench Check Price
Screw Drivers Set Check Price
Allen Keys Check Price
Protective gloves Check Price
Oxford clean grips Check Price

How to change Oil and Oil filter of motorcycle

The most essential thing you can do to maintain your bike’s engine healthily is to change the oil regularly. As a bonus, it’s one of the simplest tasks to perform.

Step 1: Warm up the engine before the next step.

Run the engine for a few minutes before removing the old oil to let the oil drain more readily and remove more deposits with it. Take extreme caution because the engine and exhaust will be extremely hot.

Step 2: Open the oil filler cap when the bike is upright.

If your motorbike does not have a center stand, a paddock stand will be good. It has been a big benefit to have my motorbike mounted on an Abba Sky Lift for all the work I’ve done on it.

Removing oil filter
Removing oil filter

Step 3: Ensure that the oil filler cap is open, so that air can get in and prevent oil glugging.

Next, it’s time to tidy everything up.

Clean the sump plug and the surrounding region and the area where the oil filter joins the engine of any dirt.

Step 4: Unscrew the drain plug from the sump pump.

Use a spanner or socket set to loosen the sump bolt, then carefully pry it apart with your oil collect tray beneath (with your latex or similar gloves). You can feel when the threads on the bolt have run out by slowly removing it while keeping it pressed in; The sealing washer should be on the bolt; if not, remove and discard it from the sump.

Draining the oil
Draining the oil

Drain the oil completely out.

Step 5: To finish, tighten the sump bolt.

Ensure the old washer is out of the way, but the new one is on, and then insert the bolt into the sump. Tighten it to the specs with a torque wrench if you have one.

Filling oil in bike
Filling oil in bike

If you don’t have a torque wrench, be cautious not to overtighten this bolt. It’s just 20Nm.

Step 6: Remove the oil filter in the final step.

Change where you place your catch tray.

If oil is dripping from the filter-to-engine block gap, you can unscrew it with a filter removal tool. After draining the engine, there shouldn’t be any further leaks, but keep in mind that the filter will still be dripping with oil.

Step 7: It’s time to lubricate the new filter!

Applying oil on oil filter

The huge rubber O-ring in the filter may be cleaned by wiping some of your new engine oil on your finger.

Step 8: Replacing the oil filter is the last step.

After cleaning the filter seat:

  1. Turn on the filter by spinning it.
  2. Tighten the necessary tension with a torque wrench and cup wrench (10Nm on this bike).
  3. Spin it on till the rubber seal hits and tighten it by hand 34 of a turn if you don’t have the necessary equipment.

How to clean or replace spark plugs of your bike.

You can tell a lot about how well your engine is functioning by looking at the life expectancy of your spark plugs. Like my Honda Grom, getting to the plugs is a breeze in certain vehicles. Still, it may be a tedious process in other vehicles, which is why having a dealer do it for you can be so expensive…

Step 1: Removing the tank and airbox is the first step.

On this bike, in addition to removing the airbox lid, you must also remove two additional bolts and the hoses that connect to the base of the airbox.

Laying a towel over the intakes will ensure that nothing falls into them.

Step 2: Remove the plugs and wash the area surrounding them.

You don’t want to get any grit or tiny stones in the wells where the plugs sit since they’ll fall into the engine when you remove the plugs. Remove any loose grit by using an airline (I used my Brühl bike drier) to blast it away after you’ve cleaned the area thoroughly.

Step 3: Take out the ignitor

Make a mental note of how the plug leads are out; if they have no label, you’ll want to use tape to help you reinstall them correctly.

You’ll need to remove the plug covers first, then use a socket or wrench to unscrew the spark plug from the vehicle. If the rubber bung on the plug isn’t holding it in place, use a magnet to pry it out.

Step 4: Inspect the spark plugs for damage.

You may learn a lot about an engine by examining the end of each plug as you take it out. At first, I was alarmed when I noticed oil on a couple of the plugs in my ZX-6R, but closer inspection revealed that the oil covered the whole thread. Because of leaks in the valve stem oil seals or piston rings, the end of the plug would be coated with oil while the threads would be completely unscrewed from the cylinder head. For no apparent reason, the oil began dripping down the plug well and coating its threads as soon as the spark plug was withdrawn from its socket.

Step 5: Observe the electrode gap in step five.

Cleaning plugs is possible if done carefully with a wire brush and after making sure there is no damage. When it comes to me, I just replace them.

Spark Plug worn new gap
Spark Plug worn vs new gap

You should use a feeler gauge to verify the electrode gap. Still, I haven’t seen one in the recent 10 years that needed altering from the factory settings. You can bend side electrodes to fit if necessary. When using fine iridium plugs, avoid pulling on the electrode tip.

Step 6: Finally, insert the spark plugs into the engine.

Cross-threading the plugs is important because they’re into an aluminum cylinder head with steel threads. Once I’ve found the hole, I turn the plug anti-clockwise to unscrew it. The threads will drop over each other as the plug spins. You may start turning the plugin by hand immediately after the threads drop over – it should have picked up correctly.

Inserting spark plug into engine
Inserting spark plug into the engine

Make sure to insert the plug completely by hand before trying again.

It’s a good idea to use a torque wrench. Taking them apart will cause the crush washer on the plug to compress when you remove them… Although it may seem as though the treads are coming out, remember that you screwed the plugin by hand, which should give you some comfort.

When changing spark plugs for the first time, you’ll want to borrow or buy a torque wrench. You must be extremely cautious when doing so.

Afterward, reinstall the airbox and tank and the plug covers in the right sequence.

Zero has announced that its Zero SR model is now available in the UK

There will be a new entry-level ride available in the UK from April 2022, according to Zero.

According to Zero‘s press release, “tuned to generate 166Nm of torque, peak power of 74 horsepower, and a top speed of 104mph,” the Zero SR design is on the same platform as the SR/F model.

The bike’s performance can boost to be on par with the SR/after F’s purchase if the owner wants. A top speed of 124mph is 190Nm, 90hp, and 90hp.

Z-Force batteries

Zero SR will feature new Z-Force batteries, which will have the latest generation of Zero’s Z-Force battery technology.

The new Z-Force batteries have a slimmer and lighter design and increased range and energy density.

By purchasing a Cipher Store upgrade kit, SR owners can extend the bike’s energy storage capacity from 14.4kWh to 17.3kWh.

Peroformance of Zero SR

A new Cypher Store feature from Zero allows users to enable the “Speed & Performance Boost”. It allows the SR to be upgraded to Advanced Bosch Motorcycle Stability Control. Which adds the cornering capability to the SR’s straight-line ABS and traction management, as well as drag torque control.

As a result of this new “Power Tank” add-on, Zero will be able to extend the range of its motorcycles to 227 miles in the city in early 2022, which will be the highest battery capacity Zero has ever supplied on one of its motorcycles.

Cypher Store will also contain possible improvements to your Zero. It includes “faster charging, extended range, speed and performance boost,” “park mode,” and “warm grips. It will feature on-dash satellite navigation,” according to Zero.

Zero SR
Zero SR 2022

Type 2 connectors are used at public charging stations to recharge the Zero SR. The “wall outlet adaptor” is likely to be a preferred option in the UK to power the SR at home.

CTO Abe Askenazi of Zero Motorcycles explains that “the SR is the motorbike that launched the electric naked street category. It is significant that it be the first model to introduce all of these new features” in a statement.

Prices for the Zero SR start at £17,810 for the “graphite” color option. For more updates keep visiting BikersInsider.

This year, Ducati will bring its Ducati DesertX Tour to Britain.

The Ducati DesertX idea was initially revealed at EICMA in 2019. However, it was evident that the machine was little more than an idea. However, the House of Borgo Panigale decided to make this bike a reality after receiving positive feedback from fans and other stakeholders. Scrambler 1100’s design was initially on board, but production models would have some important differences.

Ducati DesertX with Rider

One of Ducati’s World Premiere episodes introduced the DesertX in December 2021, unlike anything we’d seen from the Italian firm before. In terms of off-road capability, it’s even more extreme than the already mighty Desert Sled. Powered with Ducati’s newly developed 90-degree V-twin, the DesertX.

DesertX Specifications

The engine is a 937cc, 90-degree V-twin with Desmodromic valve actuation, similar to the one found on the new Ducati Monster. The DesertX, at roughly 110 horsepower, is to be a blast both on and off the road. You’ll be able to accelerate more quickly and get more leverage off-road with a shorter gear ratio. A longer sixth gear makes it easier for drivers to cruise around the motorways, ready for the next exciting adventure.

Ducati DesertX
Ducati DesertX

Ducati DesertX appears to be one of the best middleweight adventure bikes currently available, both on paper and in press images. Waiting for the bike to arrive in stores is all that’s left for us to do. The wait appears to be over, as Ducati has just launched the DesertX Tour in the United Kingdom. Fans and potential owners of Ducati’s new adventure bike, the DesertX, have the opportunity to get up and personal with it.

DesertX Tour Schedule

From April 7 to May 12, 2022, certain Ducati dealerships in the UK will host the DesertX Tour from 6 p.m. to 8 p.m. Several Ducati experts will be on hand to answer any queries regarding DesertX during the tour. Accessories and clothes will also be on display at the event. Additionally, consumers can request test rides during the trip. They will be eligible for a demo when the stock arrives in the store.

Starting at USD 16,795, the Ducati DesertX is currently available for pre-order. If you have your heart set on owning this stunning adventure bike, make a reservation with your local Ducati dealer as soon as possible. In June of 2022, the bikes will be available for purchase.

This beauty is included in our list of “10 Best looking motorbikes in 2022“.

New Adjustable Handlebar Risers from SW Motech

There isn’t a “one size fits all” option with all the money companies spent on research and development. When you consider the wide range of preferences among motorcycle riders, these customizations and improvements are exactly where the aftermarket sector comes in with its limitless assortment of changes and upgrades.

Wide range of options

It’s possible to customize the ergonomics of your motorcycle with a wide range of options. Taller handlebars or shaved saddles can achieve a more upright riding position. Those who want a more sporty riding position can opt for clip-on, drag bars, or clubman bars on their bikes. The possibilities are limitless when customizing your bike’s fit. Several companies, including SW Motech, are famous for their motorcycle baggage and accessories. They have invested a lot of time and money in these goods.

Build quality

Adjustable handlebar risers from the German aftermarket specialist allow you to keep your bike’s OEM look. It will be adjusting the bars to your preferred height. The new bar risers from SW Motech are of machined aluminum and come in various hues. It will match most OEM paint schemes. There are three handlebar diameters to choose from—22, 28, and 32 mm—so they may adjust with a wide range of motorcycles. It can be from dirt bikes to big-bore adventure tourers. Whatever your height, the risers may be set in seven distinct places that are each 5 millimeters apart.

For the most part, installing handlebar risers on a naked or touring bike is a piece of cake. These bar risers are a simple and cheap solution to change the ergonomics of your motorcycle in a way that it’s simple and affordable to return it to its stock settings.

SW Motech’s new adjustable bar risers retail for 170 Euros (approximately USD 187). They are available in black, silver, or anthracite. SW Motech claims that the product design will fit all prominent motorbike brands for your peace of mind. Thanks for reading and for more news and updates, keep visiting BikersInsider.

Potential Rival to the Kawasaki Ninja 400, CFMoto 450SR

A few images of the new SR’s front fascia with “Power is as strong as 500CC” emerged on Facebook. It’s as light as a 250CC in weight. This engine’s specs read 37 kilowatts (49.6 horsepower) and 39 Newton-meters of torque.

cfmoto-450-sr-featured

Compared to the Kawasaki Ninja 400 and Honda CBR500R, this is a good figure in the 400cc to 500cc category. The CFMoto 450SR should compete well against its Japanese rivals in this class of motorcycles. And in this category, every cubic centimetre and horsepower matters. The Honda CBR500R may have been the target of the post’s caption.

It has been revealed that the finalized CFMoto 450SR sports bike has broken its cover. Its saw characteristics are first seen on the SR-C21 Concept prototype unveiled at the 2021 EICMA event.

CFMoto, a growing number of Chinese motorcycle firms aiming to enter the European market, has made the most progress.

Build and design

Before known for badge-engineered low-capacity models, the 700CL-X line, which includes the Heritage and the Sport and the more inexpensive 800MT, has made quite an impression.

As part of its SR sportbike collection, CFMoto has launched the 450SR slot between the well-designed 300SR that debuted in the UK in 2014.

CFMoto-450SR-Front
CFMoto 450SR Front

The 450SR gets a new, sharper family face design previewed by the SR-C21 concept. It should have a strong shape that should allow it to cut a dash alongside rivals, the KTM RC390 and Yamaha R3.

Engine specs

The engine is a 449cc single-cylinder with 50 horsepower, but this could be reduced if the model must meet Euro5 rules or be made A2 compliant. It also claims a top speed of 190 km/h (118 mph), but we’ll have to test it out first…

CFMoto-450SR-Head
CFMoto 450SR Head

While it’s a bit heavier than the RC390 and R3, it still manages to match the power and weight of the CFMoto 450SR.

Although the 450SR shares many of the SR-architectural C21’s characteristics. It is still unclear if this is the ‘final product’ of that design endeavour.

It was unclear if CFMoto planned to put the Italian-designed motorcycle into production. A more powerful and specialized model with a single-sided swingarm, high-set SC exhaust, and Ohlins suspension is in, rumours say. There was no sign of what engine it was packing.

For more news and updates, keep visiting BikersInsider.

Ducati Unveils The XDiavel Nera.

A new limited-edition motorbike, the XDiavel Nera, from Borgo Panigale, was unveiled at the Milan Motor Show in Italy this week. Ducati used the Poltrona Frau Flagship Store to unveil its newest model, only available in 500 units worldwide.

Ducati and the Interiors in Motion Business Unit of Poltrona Frau collaborated to create the XDiavel Nera. This one-of-a-kind motorcycle combines exhilarating performance with a custom look and feels.

Limited Edition

An exclusive 500-unit production run of the XDiavel Nera has an announcement. The bike itself comes in Ducati’s “Black on Black” paint, but it’s the addition of Poltrona Frau furniture that sets it apart from other XDiavels.

ducati-xdiavel-nera-launch
Ducati Xdiavel Nera Launch in Milan, Italy

Color options for Xdiavel Nera

The hand-tanned Pelle Frau leather seat is the pièce de résistance of this gorgeous version. The material results from Poltrona Frau’s years of research are soft and velvety, with top-notch aesthetic features. To tan the leather, you can choose from five different colors. Color options include Siam Red (steel blue), Steel Blue (cemen), India (cemen), Selva (selva), and Cemen (cemen). An advanced laser procedure to create this unique saying, evoking the “X” in XDiavel’s name.

ducati-xdiavel-nera-seat
Ducati Xdiavel Nera seat with X markings

A broader base and a backrest, as well as the ultra-luxurious material, combine to create a seat that is both comfortable and stylish on Ducati’s power cruiser. Buyers will also receive an original keyring and documentation crafted from the same Pelle Frau leather as the seat as a thank you for their business. Additionally, the “Black on Black” paint on the bike features a dedicated jet helmet.

Ducati-XDiavel-Nera-with-helmet
Ducati XDiavel Nera Black to Black Helmet

Ducati has also put together a video to watch to get a more in-depth look at the XDiavel Nera and its development.

The XDiavel Nera, together with the Dark and the S, is currently on sale at Ducati dealerships around the country.

For more news and updates keep visiting BikersInsider.