Table of Contents
Introduction
For motorcycle maintenance, fork seals oil and bushes are one of the most frequently overlooked components. This fork oil can be used for the whole life of some motorcycles. Every two years or 15,000 miles, thank your fork with a new oil change for all the hard work it performs to make your ride smooth. You may have noticed a droplet of oil on the top of the slider during your pre-ride inspection, even if you’ve been a careful caregiver of your cruiser. Until you repair the seal, you’ll have to limit your riding time.
Even though they are merely two rubber rings, they are vital! After a long afternoon of washing and polishing, fork tubes that were freshly cleaned are all greasy and filthy after only a few kilometers of riding. If this happens to you, your fork seals are to blame. A filthy fork tube is the least of your concerns in such a situation. Road holding can be substantially compromised by ineffective damping. Still, the worst-case scenario is that oil leaks onto the brakes, causing them to fail. If you’re replacing the fork seals, make sure you do it on both sides.
How do change motorcycle forks seals?
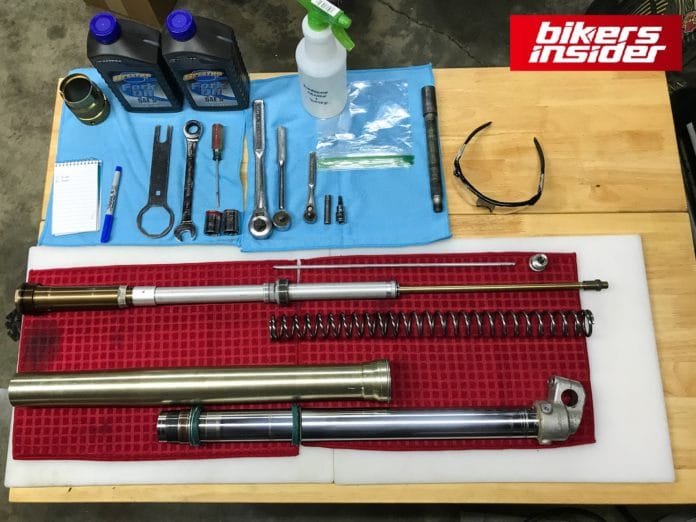
To ensure a smoother process, gather all necessary components and tools in advance. It doesn’t matter if you just need to replace one seal; you should always replace them in pairs. Most of the time, the components are less than twenty dollars. Make sure you know how much oil you’ll need before you begin. A single bottle of fork oil will not be enough, so don’t expect that one bottle per fork leg will be enough.
Your toolkit should include all of the standard fares from a mechanic’s toolbox. Bike support is also required when the front wheel is removed. You don’t have to spend a fortune on an elevator if you don’t have one. You’ll also need an oil recycling container, a Ratio Rite (for measuring the correct amount of fork oil), a Race Tech Fork Oil Level Tool, or a tape measure that fits inside the stanchions (the small-diameter inner tubes), seal drivers or a piece of PVC pipe with the appropriate diameter, rags, paper towels, and a heavy four-wheeled car.
Tools you will need
- Allen Keys
- Socket Set
- Flat screwdriver
- Spanners
- Ruler for checking of fork oil level
- Fork seal and bush fitting tool or a hollow pipe of stanchion size
- Brake cleaner
- Impact Wrench
Step 1: Unscrew the sealing plug
With a socket wrench, unscrew the cap. Warning: The cap may burst with considerable force when the threads disengage. Even if you’ve planned ahead, the cap may still elude you. Keeping your face out of harm’s way is critical, so aim the cap at anything solid to ensure your safety. It will be simpler to locate the cap in the corner under the mound of tarps if you cover the top of it with a thick, heavy cloth.
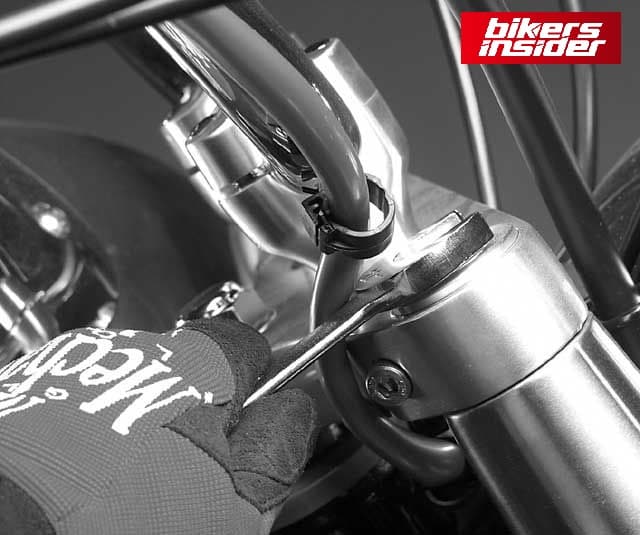
Forks with circlip-secured caps sometimes need the use of three hands to liberate them. While the other person removes the circlip, one person applies pressure on the cap. A cloth should then be wrapped over the top of the fork to keep it steady when the circlip is removed.
Step 2: Remove the fork tube
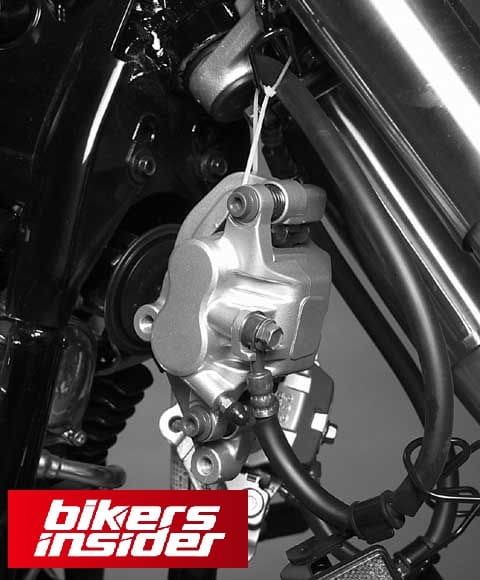
Remove the mudguard, wheels, and brake calipers off your motorbike after being jacked up. Because the hydraulic system does not need to be opened, you can simply join the calipers together on one side with insulated wire or cable. It’s time to let go of the brakes completely. Unscrew the bottom triple tree clamps and then gently twist the fork tubes out of the way.
Step 3: Removal of upper fork screw and drainage of fork oil
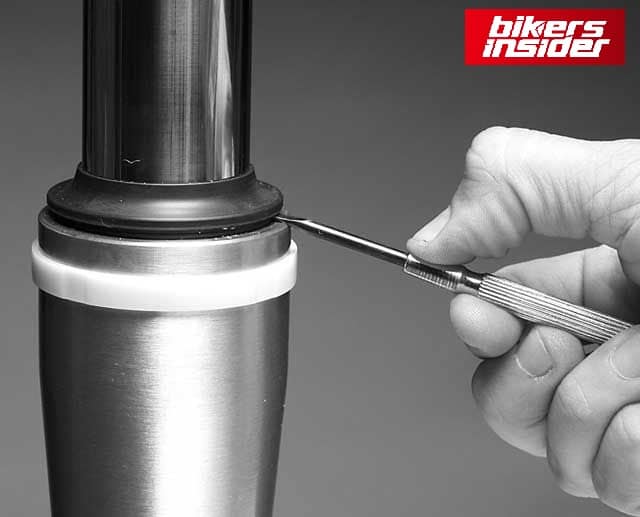
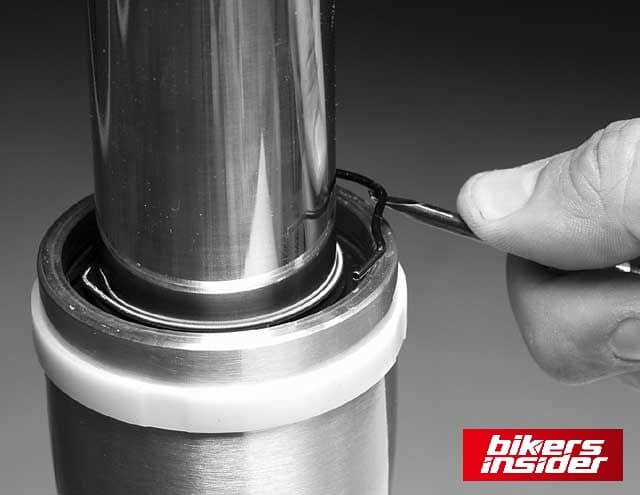
Preload spacer and washers should be removed from the stanchion and placed on a clean towel. Reassembly will be easier if they are laid out in the correct sequence and orientation. Pry the dust seal off the top of the slider using a little flat-head screwdriver. Remove it from the stanchion’s top. Remove the retaining ring from within the slider immediately above the fork seal.
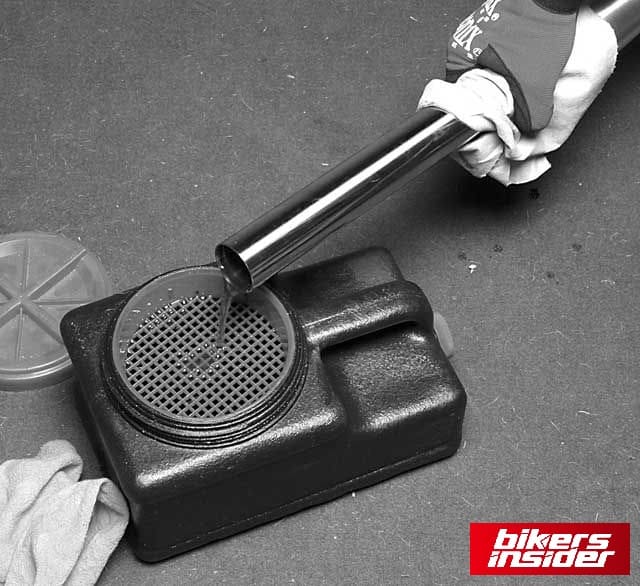
You’ve arrived at a crossroads. It’s time to get back to your caveman origins and use physical power to get the stanchion out of your fork seal. Drain the fork and remove the damping rod bolt from the bottom of the slider. This approach allows you to see the fork bushing to check for signs of wear. This has the drawback of requiring a substantial amount of extra effort in extra steps and perspiration.
Step 4: Opening the lower fork screw
Remove the hexagon socket screw that holds the slider and the damping rod together from the bottom. This can be a bit challenging. You must insert a suitable socket and two extension bars into the fork tube to grab and hold the damper rod as a preventative measure. If you don’t have the proper tools, pre-assembling the fork could be good. Because of the tensioned fork spring, the damping rod should not spin.
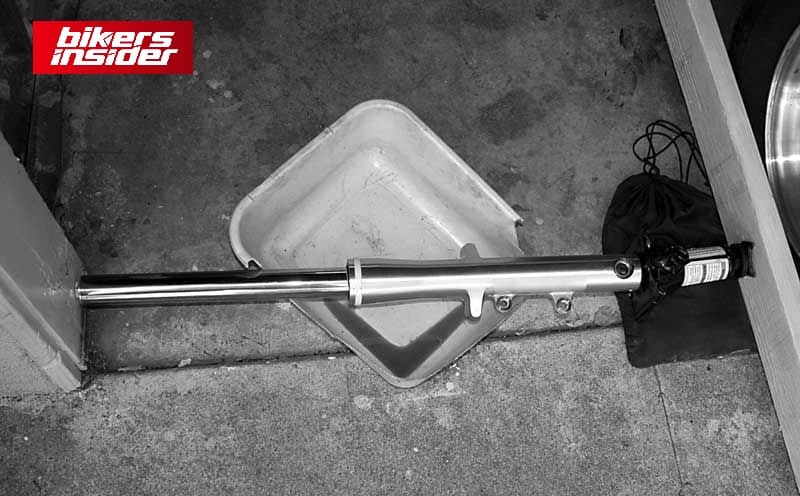
Tools you will need.
You’ll discover a sealing washer beneath the hexagon socket screw that must constantly be changed. Chromed fork tubes must be treated with the same care as a basket full of uncooked eggs! It only takes two or three miles of riding for a seal to leak again after a few millimeters of damage has been done to the fork tube. You should only use a vice to clamp the fork on the slider, such as on the brake caliper support brackets. Garages often have air impact wrenches, so you can always pay them to remove the screws if all else fails.
The dust cap’s seal is held in place by a circlip. Next, you’ll need to remove it. Pry the dust cap off with a tiny screwdriver. Then slide it up the tube and press it inward to pull it out of the groove to remove the circlip.
Step 5: Replacement of defective seals
Once the slider is tightly clamped, jolt the fork tube several times to force the guiding bushing out of the slider and remove the seal. The seal may then be removed by pulling it upwards. A guiding bushing in your fork will allow you to easily lever out the seal even if it doesn’t come out with the fork tube removed. A bike repair manual is required if you plan to disassemble the fork further, such as cleaning it and inspecting it for damage (minimum fork spring length, wear in the slider, etc.). O-rings and sliding bushings may need to be replaced while removing the fork. If you have any doubts, get the advice of a specialist before making any decisions. Reassemble the fork when it has been cleaned. Install new copper washers on the sliders’ bottoms to retain the damping rod bolts.
The replacement seal will be simpler to insert into the slider if you lubricate the seal’s outside surface and then the sealing lip to prevent damage when the fork is reassembled. Inserting the seal is best done using a professional fork seal driver, but you may also use a suitable pipe. When you begin tapping, place the old seal under it. Although you shouldn’t have to tap too hard to get the seal in, avoid using any sharp objects that might harm it. Drive the seal so far that you can use a screwdriver to push the circlip into the groove.
Step 6: Fill up fork oil
Use a workbench or your bike’s fork tubes to add fork oil. It’s up to you. This time, we’re going to do the filling on the bike. You must ensure that you use the correct viscosity and the correct amount of each ingredient. Not the oil, which is responsible for dampening, but the springs themselves. Using aftermarket fork springs, such as Wirth fork springs, can alleviate some bikes’ inherent chassis issues. Compared to the original, these springs have a 30 percent greater hardness rating, are type approved, and coiled progressively. Wirth springs require very little or no air assistance if your forks are air-assisted, which helps increase the life of your seals.
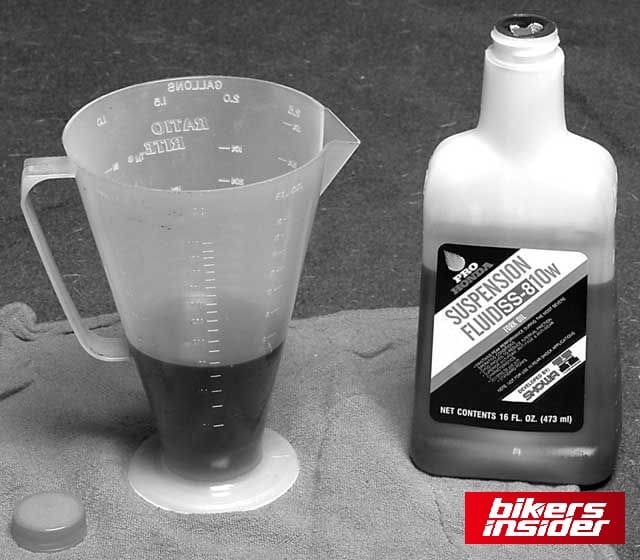
A torque wrench should be used to tighten all the bolts and nuts on the vehicle following the repair manual. Pads need to rest on the brake discs when the brake is primed. The car may be lowered from the jack once more. Ride your bike again with a whole different perspective. After a brief test ride, inspect the fork for leaks.
How to change fork bushes?
After some time, the bushes will wear down, resulting in a small degree of play between the stanchion and the tibia. When it comes down to it, you’ll see the fork seals fail first, and since the bushes have to come out to get them out, you might replace them all.
You can replace your weary bushes while changing the fork seals. For this purpose, you will follow the first four steps from the replacement of the fork seals section and after that:
Step 1. Remove the bushes
A flat-bladed screwdriver may be used to pry open the bottom bush, allowing it to be slipped off the bottom of the stanchion, followed by the top bush, its washer, and the oil seal.
Step 2. Removal of the stanchion and cartridge
So long as the fork leg is still attached to the bike, you should be able to remove the stanchion by simply unscrewing the top cap. Keeping the preload adjustment in place while loosening the lock nut will allow you to do so more efficiently. Then unscrew the lid, which will enable you to remove the damping adjustment rod and the damping cartridge, complete with the washer, spacer, another washer, and the spring. Keep an eye on the seat between the cartridge and the leg of the fork.
Step 3. Check for any minor issues
Using a 1200 grit emery paper and some WD-40, gently sand away any minor ridges you find on chrome fork stanchions using your fingernail. Keep sanding, but go slowly and watch for the glossy region you’re rubbing; you only want to remove the little lip of chrome, not the rest of it.
If the forks need re-chroming, go to an expert who can maintain the thickness perfectly within tolerance. Else the diameter of the stanchion could not meet the seals. Damaged stanchions need to be replaced immediately.
Suppose once the edges have been scraped off. Suppose you’re left with a hole in the chrome caused by corrosion. In that case, you really should replace the stanchion or have it professionally re-chromed. While it is possible to fill in the damage with chemical metal and then sand it down, this method is not advised and should be avoided.
Step 4. A thorough cleaning of all surfaces
Use a brake cleaner or other solvent cleaner to thoroughly clean the suspension parts, and then use a paper towel or cloth with a pokey end to wipe within the leg to ensure nothing is left behind when you’re done. Blow-dry the pieces using a compressor if possible.
Use an abrasive cloth to remove debris from the seal and clip seats on the fork leg’s top.
Examine for damage anywhere the oil seal could be once you’ve cleaned everything off. The fork stanchion can be straightened by rolling it on anything flat, such as a sheet of glass if you don’t have a run-out gauge. Also, make sure the spring is free of corrosion and sagging.
As the forks are separated, inspecting the bushes for signs of wear is a waste of time.
Also, make that the damper rod in the cartridge can move freely up and down; if it can’t, it has to be replaced.
Step 5. Replace the lower bush
With a flat-bladed screwdriver, slightly open the new bottom bush so it may be attached to the bottom of the stanchion. So after cleaning the bush and adding some fresh fork oil, you should lubricate the sides of each fork leg.
Step 6. Replace the cartridge
To ensure that it is mated with the bottom of the cartridge, place the seat of the cartridge in its stanchion and then slide it all the way into the stanchion. The lower bolt and sealing washer is now ready to be replaced. If you don’t have an impact wrench, you may tighten it by putting the spring back in and having a helper compress it.
Once you’ve gotten the stanchion as deep into the fork leg as it will go, apply some fork oil to the new top bush and slide it over the stanchion until it rests perfectly on top of the fork leg’s depression.
Step 7. Place new oil seal
Wipe some fork oil on the lip of the new oil seal, then verify which side up it is; the markings should be on the top face after double-checking the washer is in position above the bush. Replace the old seal by sliding the new one over the stanchion and into the fork leg’s top. Push the seal with the pipe or seal-driving tool until the groove is clearly visible for the retaining snap clip to be inserted into.
Step 8. Top up the oil
The damper rod can be pumped using a specific tool, although you should be able to do it by hand. It’s time to carefully pour in your prescribed amount of oil after squeezing both the stanchion and damper rod.
Using the damper rod, pump it up and down 10 times from the inside of the car. Then, pump the stanchion 10 times in a clockwise direction.
Step 8. Adjust the air gap
The distance from the top of the stanchion is more essential than the amount of oil. Push the damper rod and the stanchion down, then measure the distance from the top of the stanchion to the oil after making sure that all of the air is released and that the cartridge is packed with oil.
Step 9. Check the lock nut of the top cap
The damper rod’s top lock nut sets the cap’s height as it is screwed down. Rewind the rebound adjuster down before removing the top hat. Then, screw the lock nut back until it meets the cap to determine the correct setting. It’s best not to screw it in if you didn’t; instead, place the locknut back in place before reattaching the spring, such that there is 11mm of thread visible above the nut on this model.
Step 10. Put the top cap back on
Reinstall the damper cap by winding the rebound adjuster screw in until it barely contacts the adjuster rod and then reinstalling the damper cover. Just thread the lock nut back up to meet and secure the bottom of the preload adjuster in your top cap. Instead of gripping the top cap, you’ll need to counter-hold the top of the preload adjuster.
Step 11. Attach the fork cap with the stanchion
Take your fork cap and stanchion and screw them together, ensuring that the stanchion isn’t cross-threaded. The best way to do this is to use your hands to tighten it.
Step 12. Complete the procedure by tightening of the fork cap
Set the fork’s height to the top yoke’s top edge by passing it back through the top and bottom yoke. As a matter of course, both fork legs should be set at the exact same height.
Initially, only tighten the bottom yoke bolts to 20Nm, then pull the fork top caps to the correct setting (23Nm here). You may now reinstall the clip-on bars and tighten the top yoke nuts before reassembling the rest of the bike.

