

Table of Contents
Introduction
One of the items that you don’t think about until something goes wrong is the wheel bearings. And do you have any idea where you’ll be at the time? Make a quick side-to-side wobble of the wheels part of your oil change/minor service checklist to prevent finding yourself in a tidal poo torrent. Wheel bearings can be replaced more frequently if replaced every few hours or every few kilometres. Suppose your race or play in sandy or muddy conditions regularly. In that case, you may choose to shorten this interval to every 5000 kilometres (or 80 hours).

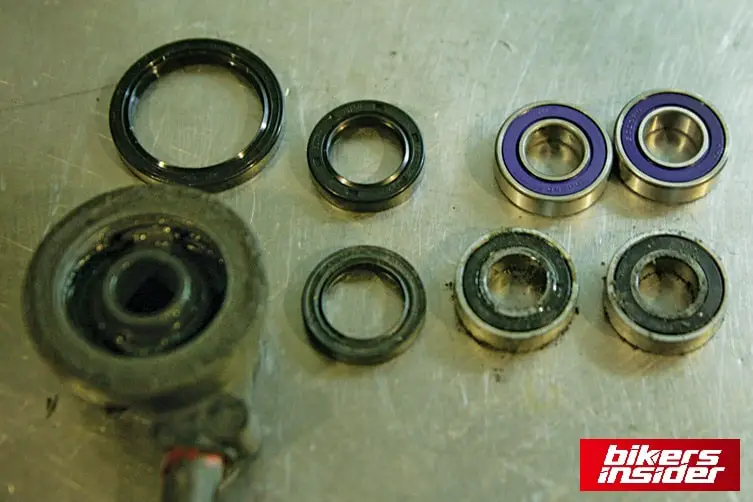
We’ve used a seals-and-all aftermarket kit for this feature. Bearings and seals can be purchased individually or as an OEM part from your local bike store.
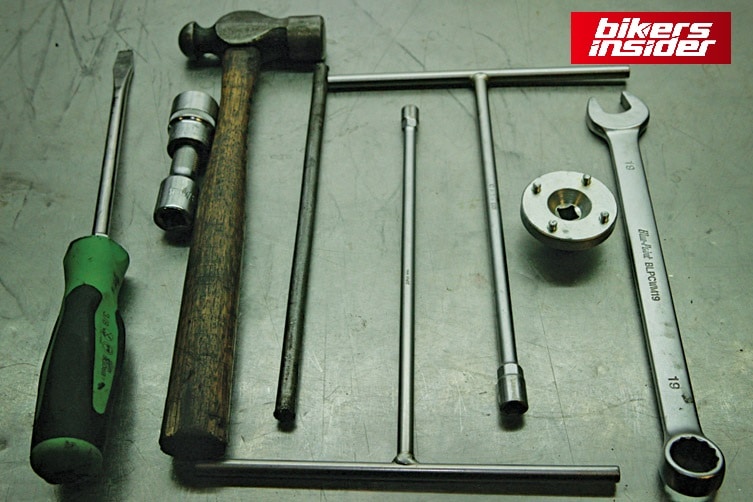
Tools required for the replacement
Oil seal prising tool (can be a screwdriver)
Long metal drift/punch (8-10mm diameter)
Circlip pliers or a Honda wheel bearing retainer tool
Removal of the old bearings
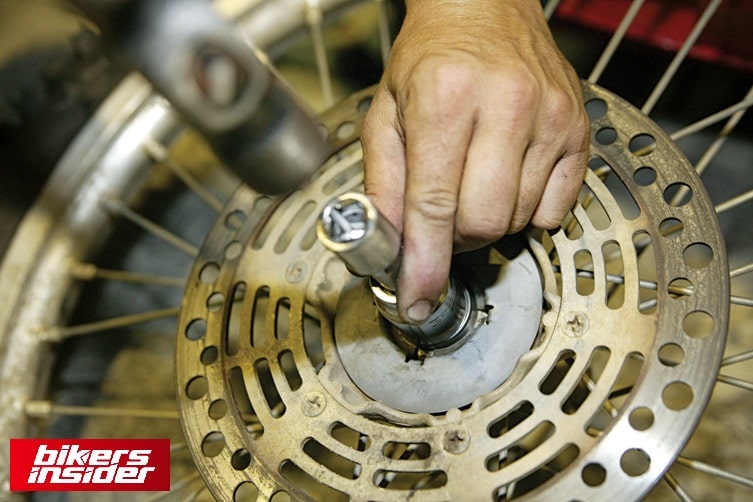
The side-to-side examination has revealed play. Therefore we’ll need to repair the bearings. To begin, remove the wheel and any spacers from it. Using a medium-sized screwdriver, pry the seals from their slots. Get rid of all the gunk and look for a circlip or collar to keep the collar in place. A specific tool is required to remove the retaining collar on Honda’s rear wheel bearings. A circlip is also common on Yamahas. As a result, there will often be three bearings to replace in the rear hub on the drive (sprocket side).
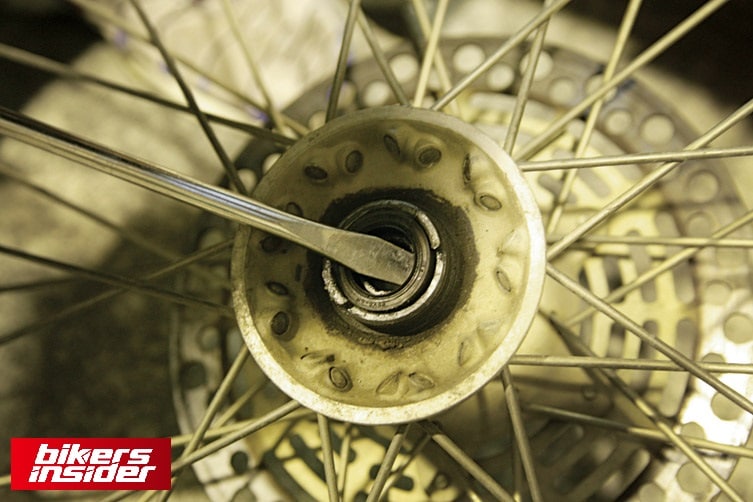
The bearings can be removed by removing the circlips. The alloy crush tube can be seen if you look between the bearings. So that your drift can gain an edge on the lower bearing, this must be shifted to one side. You’ll have to move the bearings side-to-side with the drift to get them out as squarely as possible because they’re interference fit (a tight mechanical fit) in the hub. The hub can be damaged if you attempt to drive the bearing too far out of alignment. The problem is worn hubs if the bearings are loose and virtually fall out independently.
Inspection of new components
This is a good moment to inspect the new components that have replaced the old ones. Layout the new pieces next to the old ones and see if the measurements are correct. You’ll find the component number stamped on the side of the dust seals that go on the wheels of your vehicle. A four-digit number beginning with the digit “6” will be used. Look for signs of wear on the ends of the bearings by inspecting the metal crush tube. Replace the tube if you believe it is worn out within tolerance. When the rear wheel is tightened, a worn tube compresses the bearing inners beyond their capacity, causing them to collapse.
Check the bore of the bearings to see whether they’re loose. A worn hub has only one choice in theory: toss it away. However, there are a few workarounds for a worn-out hub. Punch the bore with a center punch (preferably a sharp one) so the bearing has something to latch on. This works, but it’s not the best solution. You can glue the tiny suckers back using JB Weld (two-part epoxy) if the hub is badly worn. Only old bikes, where it’s likely the final set of bearings they’ll ever see, get this desperate. With a little heat, you can remove the glued-in bearings.
Insertion/Replacement of new bearings
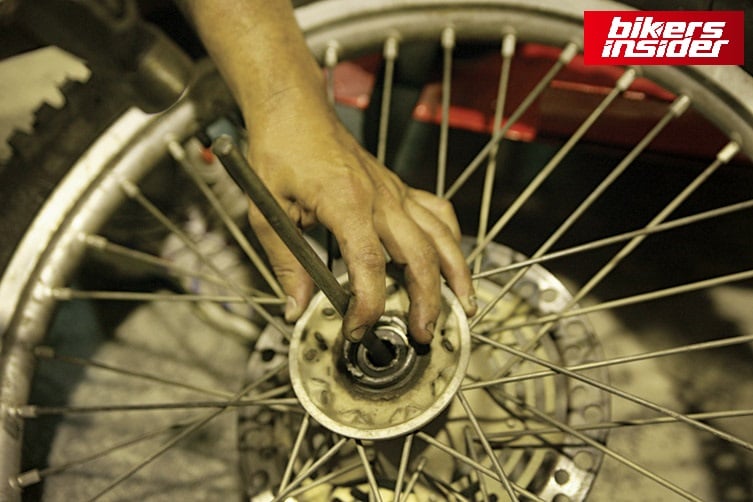
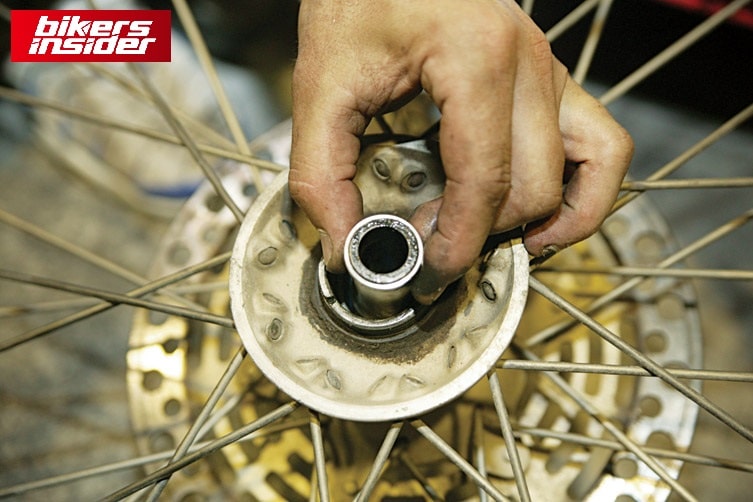
To reinstall the new bearings, use contact or brake cleaner to thoroughly clean all components. To prevent the bearings from moving within their bores, apply a thin layer of low- to medium-strength Loctite to each. Loctite bearing strength might be used if you have a loose bore. Using a socket slightly larger than the bearing bore will make new bearings easier to press. The inner part of the bearings will be destroyed and need to be replaced before they’ve turned a wheel if you strike or press on them. Only ever use the bearing’s outer ring as a means of propulsion. Ensure that the mating surface of the bearing is completely seated.
Removal of crush tube
Before installing the second bearing, make sure to replace the crush tube that was removed during the installation of the first one. Once the snap ring/threaded collar is reinstalled, the final step is to reattach the wheel to the bike and install the seals. Consider that Honda’s lock-ring is known to wear out quickly, so it’s good to constantly buy a new one. They’re included in a few packages, but you can also buy the OEM version.
Expert Tips on how to remove and replace motorcycle wheel bearings
This type of bearing features all of the wheels. Unless you’re a trader, the best location to buy bearings is at your local bearing shop. NTN LLU bearings have an impenetrable seal to muck and dust, so I like them. The sealed drag is a touch higher, but the bearings tend to survive longer than they would otherwise.
Yamahas’ front wheels had an open bearing for years, and as a result, they wear out early. Installing open bearings is not appropriate; instead, use sealed bearings.
Alternatively, you can carefully remove the seals from the bearings and repack them with a waterproof lubricant like lithium grease. Always start by rinsing off the old gunk. Maxima, Silkolene, Bel-Ray (an old favorite), and Motorex are some of the best greases to utilize.
Before installing new bearings, gently remove the dust seal and reapply the lubricant. They all leave the factory with very little lubricant, which increases the risk of early failure.
Please let us know if this guide is helpful for you. If you want more guides in the future please let us know in the comments section.


