
Your owner’s handbook probably recommends changing your braking fluid and bleeding motorcycle brakes to remove air bubbles every two years. Suppose you don’t change your brake fluid often enough. In that case, it can deteriorate over time due to water absorption from the atmosphere and air bubbles that can get through seals to make the lever mushy. These difficulties may be resolved by changing the fluid, and we’ll show you how to do it in our how-to on bleeding your motorbike brakes.
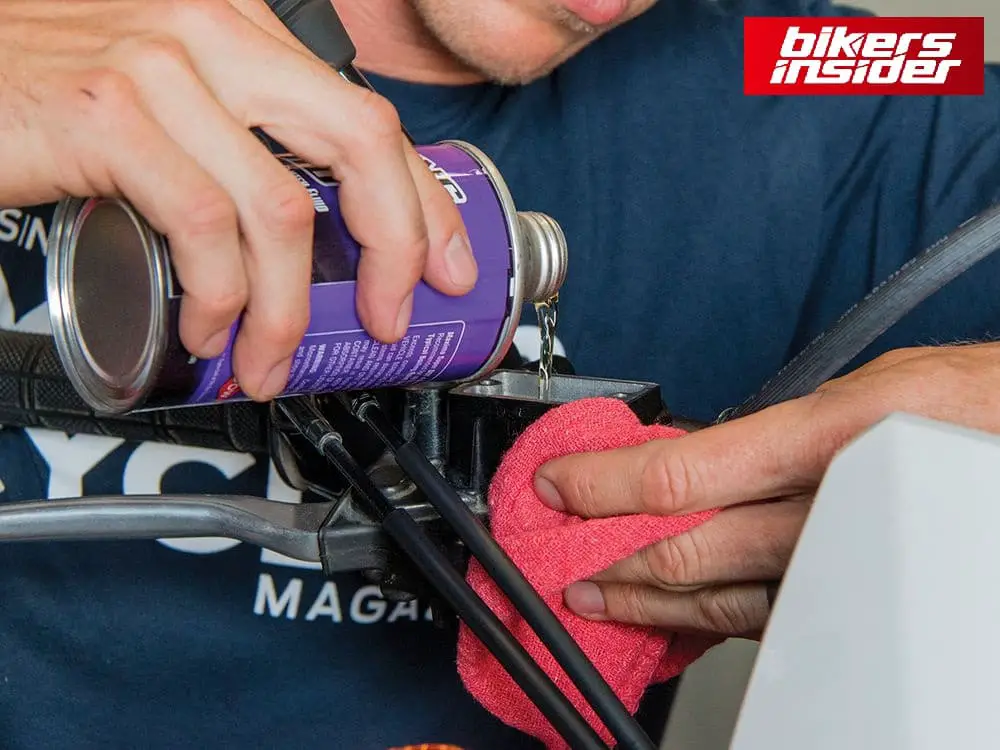
Using a clean rag, wipe off your brake reservoir, calipers, and lines before removing bolts and cleaning the fluid. This is the best way to avoid contaminating your pads or smearing your fingerprints all over your bike. Turn the handlebar so that the liquid in the reservoir is level once everything has been cleaned.
Table of Contents
Before you start
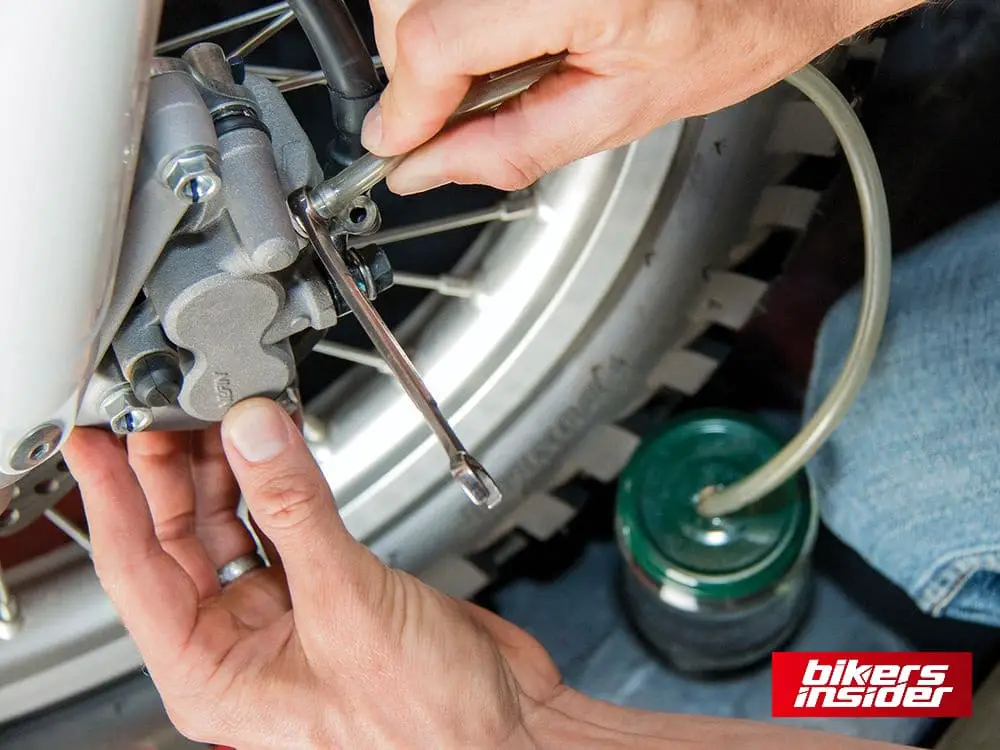
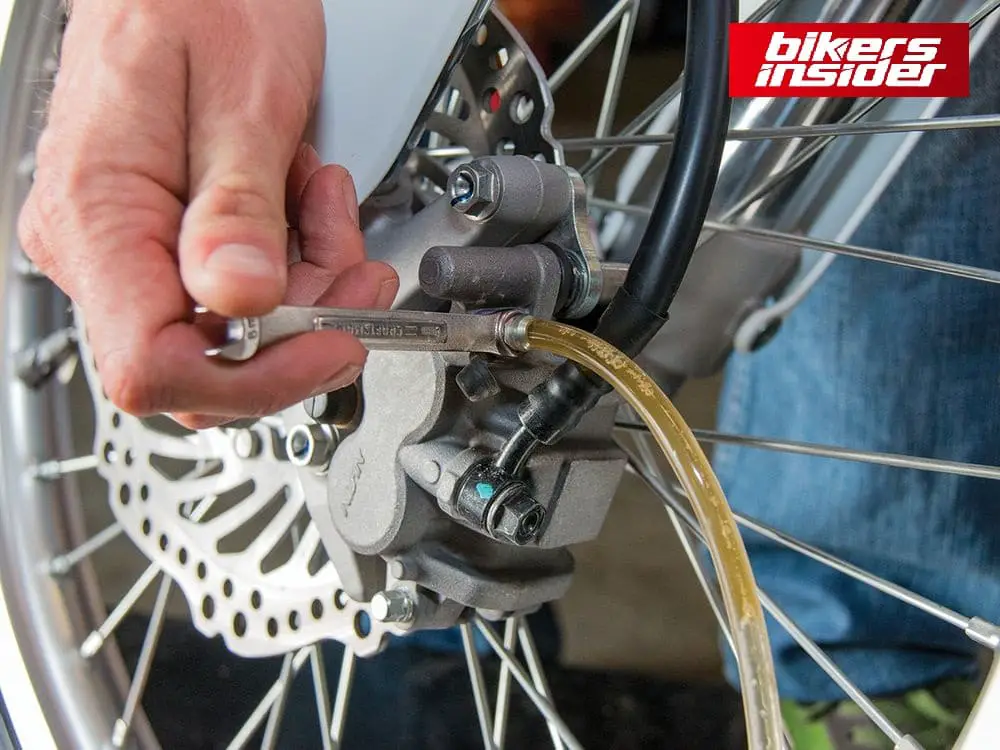
A spanner to open the bleed nipple and a screwdriver to open the reservoir lid is all you need. Let old fluid/air out of the nipple by loosening it, tightening it back up, pumping the brake lever, and holding it against the bar against the pressure. Repeat until (no) fade.
However, several devices are now available to help expedite the procedure. Using a bleed kit, you simply open the nipple and pump the fluid through — the one-way valve prevents air from being sucked back into the caliper when you let off the brake pedal.

The vacuum pump system is another alternative. This method removes old fluid and air with ease by sucking in new fluid via the lines rather than pushing it out of the master cylinder.
1. Set the bleed nipple
After pressurizing the system by pumping the brake lever, turn the bleeder screw just a little bit to let the pressured fluid out. Close the bleeder bolt once the lever has nearly returned to the bar. Close the bleeder bolt before releasing the lever. When performing this procedure a second time, pay attention to the reservoir’s fluid level.
2. Refill the reservoir as necessary
Repeat this procedure until the brake fluid reservoir is nearly empty. Once the new, clear fluid is seen, refill it again with new brake fluid; it may take a few attempts, so be patient. Don’t allow the reservoir to run dry; if you do so, you’ll have to wait much longer for the master cylinder to be bled.
3. Bleeder bolt tightening and cleaning
Repeat this procedure until the brake fluid reservoir is nearly empty. Once the new, clear fluid is seen, refill it with fresh brake fluid; it may take a few attempts, so be patient. Don’t allow the reservoir to run dry; if you do so, you’ll have to wait much longer for the master cylinder to be bled.
4. Adjustment of bleeder bolt and cleaning of the surface
Once you’ve completed the above steps and installed the diaphragm and cap, all that’s left is to tighten the bleeder bolt. Make careful to use a moist towel to clean up any brake fluid spills. Before embarking on a cross-country journey, test your bike’s brakes and lever feel. Start afresh if the lever feels spongy because you’ve got air bubbles in the line.
Important tips
Having a sufficient quantity of
brake fluid on hand is essential. Remember that it has a short shelf life once a bottle is opened, so don’t skimp on this low-cost item by recycling old fluid. Because it is hygroscopic, normal brake fluid collects water vapor from the atmosphere. To put it another way, a polluted fluid in your brakes results in tiny steam bubbles when they grow heated. As a result, your brakes become spongy and eventually cease working since steam is compressible (fluid is not). It will take a lot more heat to cause new, dry fluid difficulties.
A 250ml container like this Liqui-Moly fluid is more convenient than a larger one because you only need to use a tiny amount occasionally.
DOT4-spec glycol fluid is more than enough for road use. DOT5.1 may be used in racing, which has a higher boiling point but absorbs water more quickly and has to be replaced more frequently. However, racebikes typically have their brakes bled before each race to ensure optimal performance.
When it comes to hydraulic systems that aren’t subjected to a lot of heat, DOT3 is an excellent choice.
No other fluids can be combined with silicone-based DOT5 (DOT3, DOT4, DOT5.1). Some industrial and military customers utilize it in snowy areas. For the vast majority of bikers, this is a bad idea.
How to fit new brake lines?
Your motorcycle brake lines may need to be replaced for various reasons. Perhaps they’ve deteriorated over time, or maybe you’d like a braided stainless steel version over the conventional rubber kind. A motorcycle brake line replacement is a daunting operation.
We’ll walk you through the process of changing a motorbike brake line step-by-step and provide some pointers for making the job go more smoothly.
1. Make sure the new brake lines are the correct length
Double-checking the length of your new brake lines is a good idea before beginning the installation procedure. The quickest and most accurate method is to compare them side by side or cable tied to the current lines on your motorcycle.
While this may seem like a waste of time, it is often beneficial and only takes a couple of additional minutes. Remove your brake lines, and then discover that you don’t have a suitable replacement.
2. Get ready for any kind of mess
Even for the most skilled and experienced technician, replacing motorcycle brake lines is a nasty task, so being prepared is vital. Be careful to cover painted bodywork before you begin to protect it from brake fluid damage, and wash off the fuel tank, handlebars, and fluid reservoir with a microfiber cloth. Brake fluid should be drained from the system using a band of a protective pan (or drip tray) placed under the caliper.
3. Remove the current fittings on the brake line
Preventative precautions have been accomplished, so it’s time to get down to business. You’ll first need to remove any bolts keeping the present brake lines in place before you can install new pipes. The motorcycle brake line should be gently fed out of the chassis with a ratchet once all banjo bolts have been removed.
4. Insertion of the new motorcycle brake line
It is necessary to reverse the removal and reinstallation of motorcycle brake hoses for the most part. Reinstall the new brake line in the chassis by following the same path as the old one and ensuring each line is attached to the right caliper.
5. Tightening of the brake lines
Brake line fittings (such as washers, banjo bolts, etc.) must be replaced and reinstalled before the last step is completed. It’s crucial to take your time and just screw the fittings by hand at first to check for any kinks or bends in the brake line.
You may then tighten the brake line connections with a torque wrench and fix them in place after being confident that everything is perfect. Attach the new brake lines to the chassis to complete the job.
Replacing the brake lines on your motorbike may be complicated, and it’s not always clear which brake lines you’ll need or how to install them. Our step-by-step instructions should help, but please don’t hesitate to share your experience in this regard in the comment section. We hope this guide is helpful for you, for more news, updates, and guides keep visiting BikersInsider.